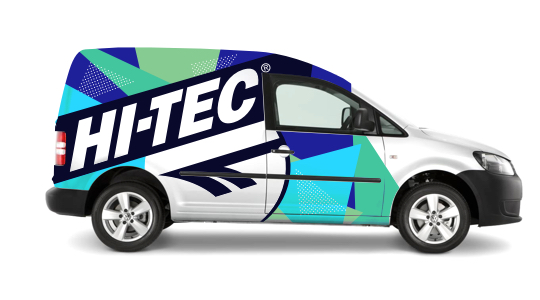
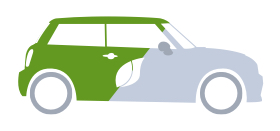
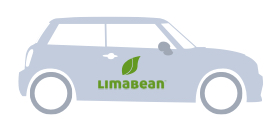
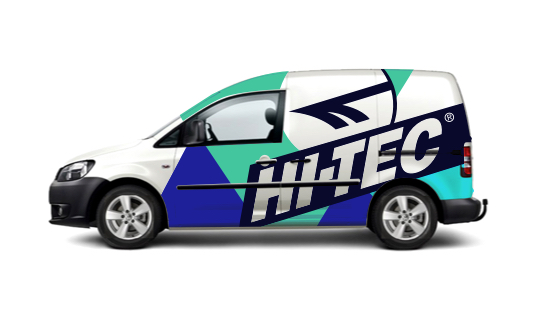
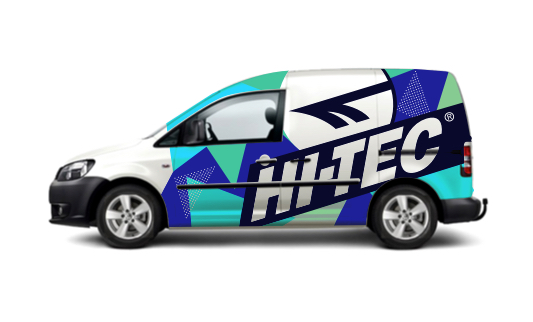
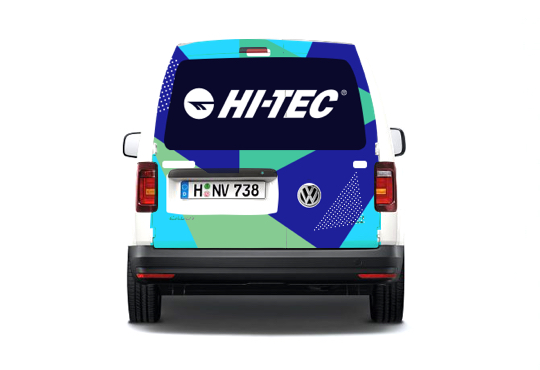
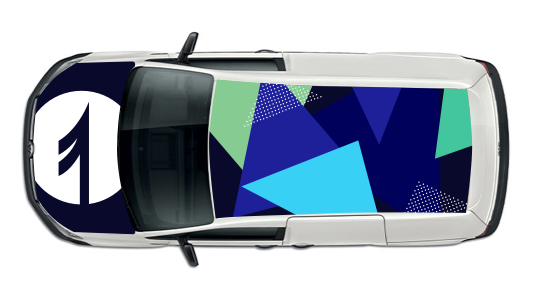
When Hi-Tec SA approached us with a request for a vehicle wrap design for their 2014 Volkswagen Caddy, they were looking for something fresh, vibrant, eye-catching, and in line with their current brand refresh.
The advantage of having such a well-established brand (like Hi-Tec), is that you are able to explore different ideas, play with colour and push the boundaries while not compromising brand integrity. The Hi-Tec logo and iconic harpoon are so instantly recognisable to South Africans that we saw no need for cluttered, squint-inducing copy or product shots that become dated.
Although some wacky ideas were thrown around initially, early mock-ups had us in agreement with Hi-Tec that the best approach would be to keep it somewhat simple – vibrant and exciting but smart and professional.
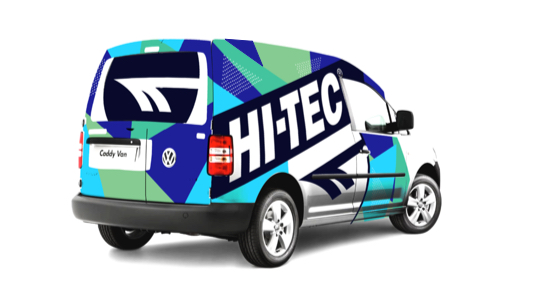
"Bold colour, creativity and freshness" was the brief!
If you have been tasked with designing a vehicle wrap, here are a few things to consider:
1. The vehicle itself
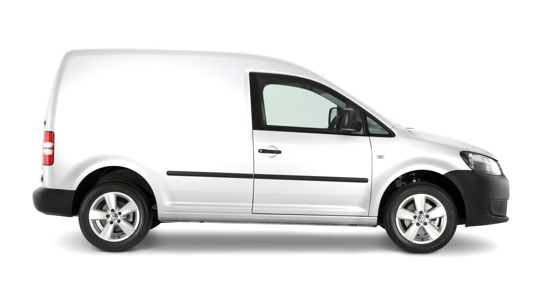
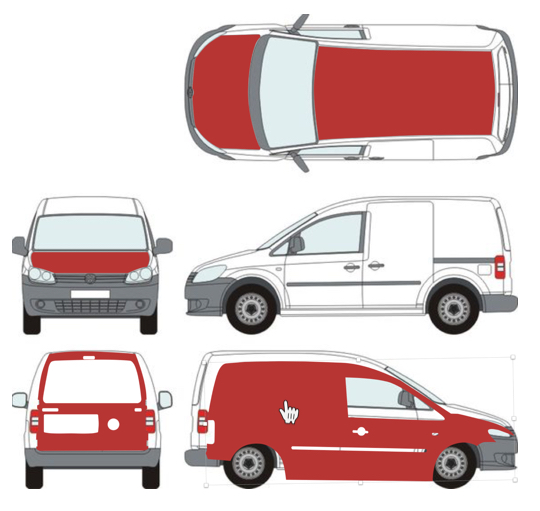
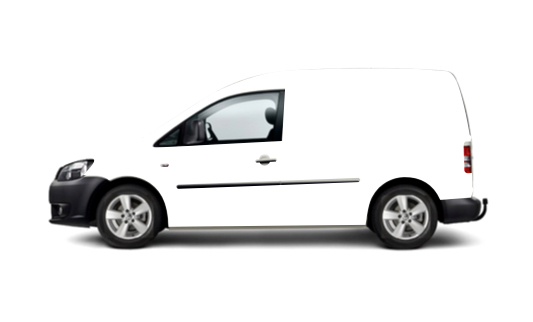
The first step was to identify the make and model of their vehicle - from the photos they sent us I could see it was a 2014 Volkswagen Caddy Panel Van. This step is critical as it in essence becomes the 'canvas' of your design. Placements and sizes of windows, handles, lights and various protrusions differ from car to car (as well as the general shape), so arrangement of elements is super important!
One has to be mindful of important elements such as logos or taglines not overlaying windows or lights, as these parts of the material will be cut out during installation. If specified by the designer however, some full body wraps do cover windows, and in these cases the material is perforated so passengers can still see safely out of the windows. Something else worth noting here is that car manufacturers periodically update their vehicles' designs, so be sure to confirm the brand, model and year with your client. A single model can also have many variations, like the VW Caddy for example, which is available in multiple versions; The Panel Van, the Maxi Panel Van, the Window Panel Van, the Kombi, the Caddy Life, the Caddy Life Camper and more recently the Cross Caddy. Phew.
2. The type of wrap required
Next you should decide on the type of wrap you're designing. There are many types of vehicle wraps in terms of materials and techniques used, cost of installation, and overall visibility, but the core approaches are:
Full wraps – this is when the entire car is covered bumper to bumper, covering the original paint completely. The equipment and labour required to apply full vehicle wraps usually makes this approach the costliest.
Partial wraps – this is when a vehicle is only partially covered and parts of the original paint underneath are left showing. The colour of the original paintjob plays a big role here as your design will have to be visually harmonious with the vehicle's finish.
Vehicle lettering – this is a simpler approach whereby words and letters are applied, often inclusive of the company logo and contact details. This technique can be effective as short-term branding with the use of easily removable, magnetised decals. Lettering is usually the most cost-effective method.
3. Speak to the printers/installers
It's highly advised you contact the company that will be printing and applying the wrap, as they might have specific design requirements regarding scale, colour, and bleed. The more accurate you can be in preparing your files, the less back and forth you will have with the printer. (Thanks to John from Martingraphix.co.za for the tour of his awesome workshop!)
4. Doing the actual design
Next comes the creative part – the visual design. The way I approached this was to first re-draw the shapes of the panels (sides, rear, roof and bonnet) according to a blueprint or 3D render of the vehicle. A photograph is not advised for this step, as it could've been unknowingly shot at a slight angle. It's best to use a digital representation to ensure shape accuracy.
This process defines your 'canvasses', as I mentioned earlier, and gives you a good idea of the spaces you're working with. You don't have to be clinically accurate to the last pixel with your paths, but be sure to include all holes and spaces like wheel arches, door handles, licence plate openings, and headlights.
Now that you have your shapes and spaces defined, you can start arranging elements:
Fill your panel shape with white or any neutral colour.

Start drawing or inserting shapes on top of your panel shape layer. (The blue outline above is the visual guide from the design app – your panel shape should have no borders.)
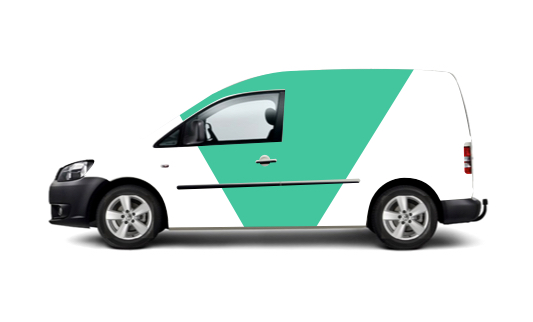
At this stage you want to start using your panel shape as a mask by clipping in your newly drawn shapes and elements.
Set the blending mode of the panel shape layer to Darken to reveal the underlying paintjob, contours and shadows, but still show your new design elements.
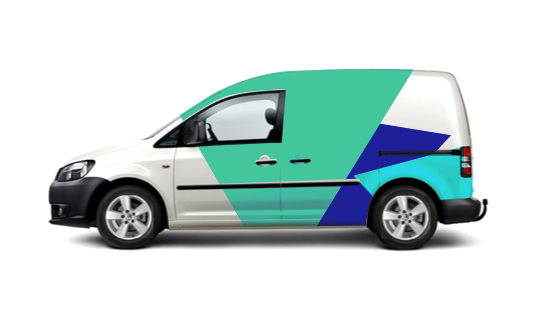
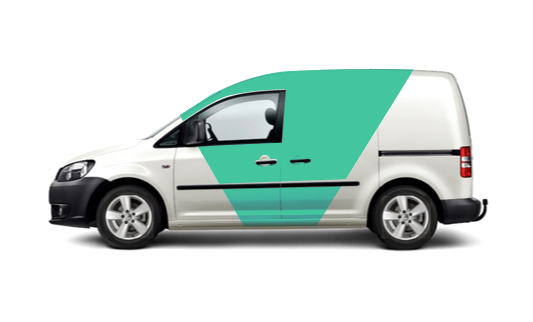
Continue to add elements to the design within this darkened mask.
Be sure to place logos and important branding elements in such a way that they are fully visible, and don't run over windows or wheel arches too much.
Some finishing touches and voila! Simply repeat the process for the other panels.
As with any design project, there are multiple ways to achieve the same results. There are various ways one could approach designing a vehicle wrap – this is just what made most sense to me. I used Sketch to produce these mock-ups because it's what I'm comfortable with - I found I could produce and re-iterate ideas quicker. Sketch being a digital design platform however, I knew that once the design was approved I'd have to re-create these in a print-ready format.